Moon shot: 7 tips on how to shoot the moon… with a camera
A Seattle photographer shares her secrets on how to capture these most amazing photos of the full moon.
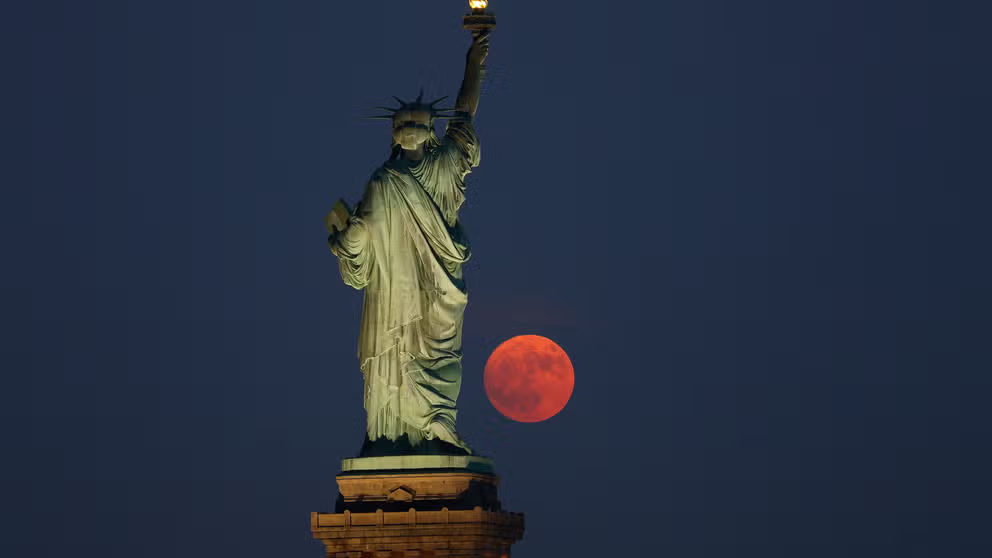
July's full Buck Moon as seen around the world
The full moon to kick off July wasn't just a full moon, but the year's first "Super" moon. It's also known as the Buck Moon. Here are a compilation of photos as the moon was seen around the world.
SEATTLE -- When a full moon graces the skies each month and puts on a spectacular celestial show for those where clouds didn't get in the way, photographers flock to find that perfect shot.
One of those is professional photographer Sigma Sreedharan in Seattle, who spends many full moon nights capturing dramatic scenes around the Emerald City.
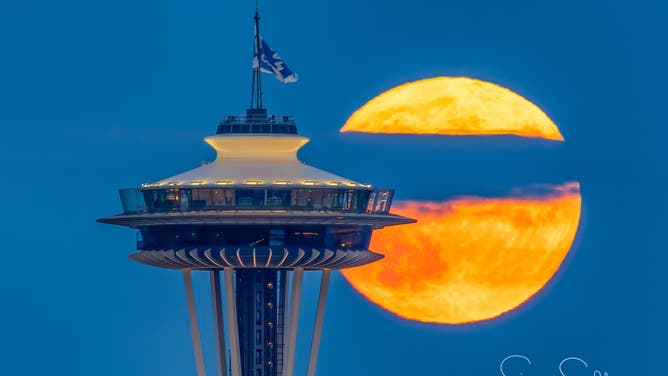
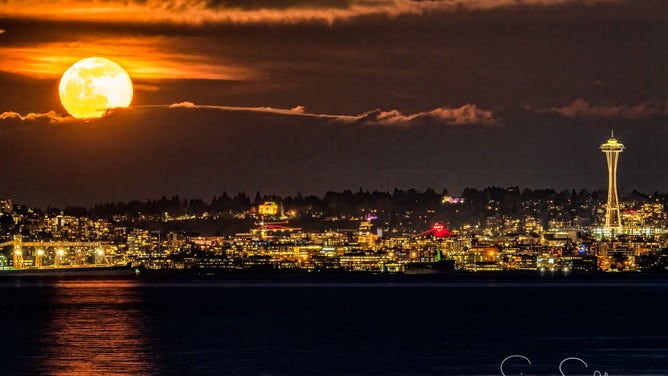
Full moon behind Seattle's Space Needle
(Courtesy: Sigma Sreedharan Photography)
The photos may elicit cries of "impossible" or "Photoshopped!" but there are indeed some camera settings you can use to get such details on the moon.
"Every time I post a full moon photo, I get a few comments along the lines of 'why does the moon look so small in my photos?', 'How do you get the details in the moon? My moon is always a bright white blob?' etc.," Sreedharan said.
But unlike a magician who keeps their illusionary tricks a profound secret, Sreedharan was willing to share her tips on getting that fantastic moon photo.
1) Shoot the moon the evening before the official full moon
The full moon rises and sets opposite the sun, so on full moon day, it rises just a bit just after sunset and sets just after sunrise. Sreedharan suggests going out the evening before the official full moon because the moon rises early enough to have still some ambient twilight left.
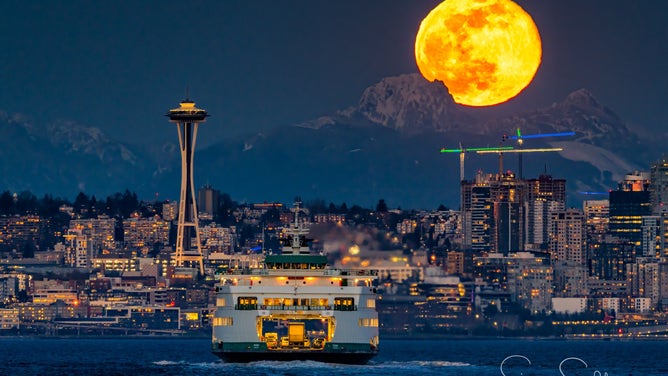
Worm Moon rises over Seattle.
(Courtesy: Sigma Sreedharan Photography)
"The day of the full moon, it is usually too dark to shoot as the moonrise is well after the sunset," she said. For example, during a summer full moon in Seattle, the moon didn't rise until 42 minutes after sunset.
"So by the time you can see the moon above the horizon, the twilight will be gone, and you will struggle with the exposure, she said. "High-end cameras can recover many shadow details, but the images will be noisy, and you will need to really do heavy processing to produce decent images."
And the moon will still be nearly 100% full so that you won't notice the fraction of the surface covered in shadow.
2) Underexpose, don't overexpose
There's also a challenge not to overexpose the frame since the moon is bright, so you usually can use the lowest ISO settings.
"Do some test shots to make sure you have the exposure right, as it is very easy to over-expose the moon," Sreedharan says. "It is much harder to recover highlight details than shadow, so try to underexpose rather than overexpose."
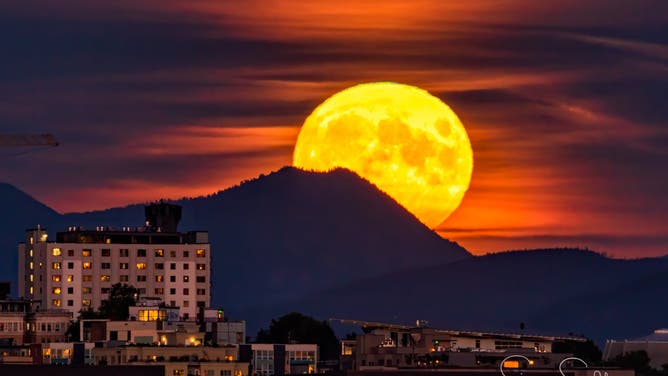
Full moon rises over the Cascade Mountains near Seattle.
(Courtesy: Sigma Sreedharan Photography)
3) Watch out; the moon moves fast!
The moon orbits the Earth at just under 2,300 mph, so be careful accounting for its movement. Sreedharan says the actual camera setting you should use to shoot the moon varies widely, depending on the time of the day, the number of clouds and other atmospheric conditions.
"(The) moon moves surprisingly fast within your frame, so you will need to use a relatively fast shutter speed to avoid motion blur and to get your composition right," she said. "Start with the aperture set to the sharpest setting for your lens, choose a shutter speed of at least 1/20th of a second and play with your ISO."
4) Tripods are a must
"Always use a tripod and a remote shutter release (or the auto-timer on camera)," Sreedharan says. That will help avoid camera shake and making your moon blurry.
5) How to keep the moon in focus
Suppose you are sufficiently far from your foreground, like when shooting the moon against a mountain or a building. In that case, you can usually focus on the foreground object, and the moon will be in focus, too, Sreedharan suggests.
"But if you are shooting it against smaller and closer subjects like a tree or a person, you will most likely need to focus stack as it is almost impossible to get your foreground and the moon in focus in the same shot using a zoom lens."
6) Use long zoom lenses to help get that "big moon" effect.
"The perceived size of the moon in your shot is relative to the size of the subject in your frame," Sreedharan said. "So if you take a wide city shot, the moon will appear pretty small, but if you zoom in to your subject, the moon will appear large. So use a longer zoom lens to make the moon look bigger."
Full moon rises over Seattle
(Courtesy: Sigma Sreedharan Photography)
She suggests at least a 300 mm lens to get a decent photo.
"Also, placing yourself further from the subject will allow you to shoot with a longer zoom, which will make the moon appear even larger within your frame."
7) Adjust focal lengths to make background elements look larger
"Different focal lengths make background elements look larger, but don't change the relative size of it with respect to the foreground," Sreedharan said. "It is your eyes playing tricks on you."
She gave this example of how she shot the same building with the same 110 mm lens but used different crops.
"See how large the Space Needle looks in a closed crop, but notice how the relative size of the Needle hasn't changed with respect to the foreground buildings!" she said. "These foreground buildings are far away from the Needle and closer to where I was standing. All elements in the photos are exactly the same relative size with respect to each other, and it is the same relative scale that you would see with your eyes if you were standing at the same place I was."
She says this shows it is not the long lens compression that makes background objects like a mountain or the moon look more prominent; it is the distance between the camera, the foreground and the background.
"The farther away from the foreground you are, you can use a longer focal length (same as cropping an image) to make your background element look larger in your photo. Relative sizes remain the same unless you physically move the camera.
And she has a simple trick you can do to prove the larger moon images aren't a trick of Photoshop.
"So if you ever looked at my photos and said 'the moon is not that big,' here is an exercise for you: Next time when you see the full moon rise, make a small diameter circle with your fingers just big enough for the moon and the closest foreground element and look through that and see how big it looks."